User Manual
This manual is another way to gather information about the game, in addition to the tutorial scenarios.
Installation
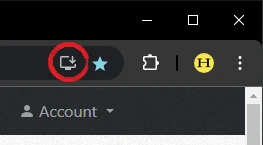
For a better user experience, Sand Saga can be installed.
- The installation is handled by the browser and works because the website is Progressive Web App (PWA) compliant.
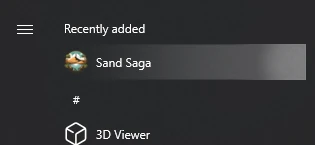
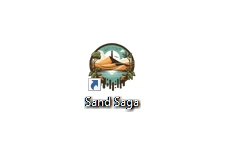
- You will get a desktop icon. The app will appear among others in the Start menu, Control Panel, etc.
- You can open .sgjs files by double-clicking them.
- It still requires an internet connection to work.
On a desktop All major browsers except Firefox support installation. Some features may be missing in Safari.


On a smartphone / tablet In Chrome for Android, a notification about the installation option will pop up automatically. In up-to-date mobile Safari, installation should also work (though possibly with limitations), but manual action in the options is required.
Feeds
You can subscribe to our updates via RSS feeds – a simple way to stay informed using your favorite feed reader, such as Feedly. Just add the following links:
https://sandsaga.com/news/rss– updates, blog posts and other announcementshttps://sandsaga.com/workshop/rss– new workshop items
Controls
Sand Saga can be played using either a mouse and keyboard or a touch screen
On a desktop The left mouse button (LMB) is used for drawing, while the right mouse button (RMB) is used for erasing. You can draw a straight line or a rectangle, you can hold the shift or ctrl key while dragging the LMB or RMB. To prevent elements from being redrawn, you can hold the alt key while drawing. To fill an area, hold both the ctrl+shift keys while using the LMB or RMB. Additionally, clicking the middle mouse button (scroll wheel) can be used to cycle through variations when inserting a template/entity (e.g., rocks, trees, humans).


There are also shortcuts that might be interesting for advanced users. Pressing ctrl+enter will pause/resume the game, and ctrl+space will execute exactly one iteration of the game. Pressing backquote (under escape) will open the action execution dialog. Here, you can use the keyboard to select tools (which start with .) and commands (which start with /).
On a smartphone / tablet Touch input or dragging can be used to draw with the primary brush. Simply touch and drag your finger on the screen to create elements.
Game Concepts
Scenarios A scenario is a predefined setup that directs how players engage with the game. Scenarios include tutorials (teach basic mechanics), missions (focused objectives), challenges (problem-solving tasks), sandbox scenarios (freeform creation), and others (miscellaneous gameplay modes).
Canvas Modes There are three modes: boxed, fall-through, and erasing. The boxed mode confines the elements within the boundaries of the canvas. The erasing mode automatically removes elements when they reach the bottom of the canvas. The fall-through mode creates a continuous cycle where elements repeatedly fall from the top to the bottom.
Canvas Size and Scale* By default, the canvas size and the scale (element size) are calculated automatically based on the screen dimensions and other parameters. By increasing the element size, fewer elements will appear on the canvas, which improves performance but also leads to a more pixelated appearance. On the other hand, if the element size is decreased, more elements will populate the canvas, providing a finer level of detail, but potentially impacting performance. The Performance metric is a good indicator.
Exporting/Importing* Canvas content can be exported (downloaded) for later use. These exports can then be opened or seamlessly placed into another canvas.
Image Templates* By importing a JPG/PNG... image (in the same way as an exported canvas), it is possible to create a template that can be placed onto the canvas. This feature enables to incorporate custom graphics.
Scripting* [advanced] By pressing F12, you can open the browser’s developer tools. Here, in the console, you can programmatically manipulate the canvas.
* This only applies to sandbox scenarios.
[more advanced]
Content Creation
For creative individuals, there are additional possibilities. They are ordered from less technical to more technical.
Resources
Resources for can be imported directly using the Import button or by dragging and dropping. Some kinds of resources can be published on the Workshop. Please note that import may be disabled in certain scenarios to prevent cheating.
There are two types of resources: snapshots and tool definitions.
Snapshots
A snapshot refers to the saved content of the canvas. It can be created using the Export button. Creating a snapshot which is interesting for other players is the simplest and most basic way of creating content. There is an ongoing effort to maintain backward compatibility. In the current version, it is still possible to open even the oldest created snapshots.
Tool Definitions
Currently, tool definitions are limited to template tools and brush tools.
Examples can be found here.
JSON Scenarios (Modifications)
Scenarios can be defined declaratively using the JSON format. This approach is good for creating themes, i.e. changing textures and colors, where there is no need to define logic.
Unlike scripted scenarios, it's not possible to define callbacks or use the API. The capabilities are therefore more limited, but this approach enables creating scenarios without any programming knowledge. JSON scenarios are also less prone to misuse and can be validated quickly. It is easy to switch from a JSON scenario to a scripted scenario because they share the structure. You should prefer the JSON scenario even if you can program, provided its capabilities are sufficient to achieve your goal.
JSON scenarios can be easily developed using the Scenario Config Editor. Then you can publish your creations to the Workshop. However, they must pass a review before others can play them. Revolutionary creations may even be featured among other scenarios in the lobby.
Documentation:
Examples:
- Official examples
- See other mods on the Workshop (set Show: Mods)
Tools:
- squoosh.app – Use this for converting images to WebP, optimizing, resizing dimensions, etc.
- base64-image.de – Use this to convert images to base64.
Scripting
With scripting, you can manipulate the canvas and control processing. If you create something interesting, you can create a GitHub gist or a repository and share the link on our Discord server.
Be aware that running scripts from untrusted sources can pose a security risk.
To begin with scripting, press F12 to open the developer tools and navigate to the console. Please note that scripting may be disabled in certain scenarios to prevent cheating.
You have access to the following global variables:
sandGame- instance of SandGamebrushes- list of brushes as a map.
Documentation:
Here are a few examples of what you can do...
// spawn fire after each iteration = fire source
sandGame.addOnProcessed(() => {
    sandGame.graphics().drawRectangle(60, 50, 100, 55, brushes.fire);
});
// bigger fire
sandGame.addOnProcessed(() => {
    sandGame.graphics().drawRectangle(120, 50, 170, 55, brushes.fire);
    sandGame.graphics().drawRectangle(120, 50, 170, 55, brushes.effect_temp_255);
});
// control processing manually
sandGame.stopProcessing();
for (let i = 0; i < 1000; i++) {
    sandGame.doProcessing();  // perform one iteration now
}
sandGame.startProcessing();
Scripted Scenarios (Modifications)
Scenario can define its own tools, templates, scenes, objectives, and customize various settings. The scenario itself is basically a configuration (including callbacks, etc.) that is passed to the engine during its initialization phase. This is how all the basic scenarios that you can see on the main page work, from tutorials to sandboxes.
Scripted scenarios can be easily developed in the Scenario IDE. Then you can publish your creations to the Workshop. However, they must pass a review before others can play them. Revolutionary creations may even be featured among other scenarios in the lobby.
Documentation:
Tools:
- squoosh.app – Use this for converting images to WebP, optimizing, resizing dimensions, etc.
- base64-image.de – Use this to convert images to base64.